To create a DIY trampoline wrestling ring, follow these 10 super easy steps. Ensure you have all necessary materials and tools ready.
Aspiring to craft an innovative, backyard wrestling ring? A DIY trampoline wrestling ring is an exceptional project that combines the thrilling bounce of a trampoline with the excitement of wrestling. This engaging undertaking is not only a hit with kids but also with adults craving a unique form of entertainment.
It’s a budget-friendly alternative to expensive wrestling rings and provides endless hours of fun. With the right approach and basic DIY skills, transforming your trampoline into a wrestling ring is straightforward, safe, and satisfying. In the next steps, we’ll guide you through the process of constructing a durable and enjoyable wrestling ring that’s sure to be the centerpiece of any outdoor gathering or playful competition.

Credit: www.amazon.com
Jumping Into Diy: Creating Your Wrestling Ring
Transform your backyard into a wrestler’s paradise with an epic DIY trampoline wrestling ring! It’s the perfect project for a weekend and sure to provide hours of entertainment. Follow these super easy steps, and prepare for some high-flying action right at home!
Gathering The Necessary Supplies
Before you start, it’s essential to have everything you need. Take a look at this list:
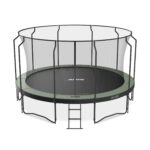
- A trampoline: The base of your wrestling ring
- Padded posts: To support the ropes
- Ropes or bungee cords: These will form the ring’s sides
- Soft foam padding: For safety around the edges
- Tie wraps: To secure the ropes or cords
- Duct tape: For additional reinforcement
- Tools: Including a hammer, screwdriver, and drill
Safety First: Preparing The Area
Creating a safe environment is crucial. Ensure the area around your trampoline is clear:
- Find a level spot: This helps prevent the trampoline from tipping.
- Remove hazards: Clear rocks, branches, and debris.
- Set a perimeter: Leave ample space around the trampoline.
- Check for overhead clearance: Avoid tree branches and wires above.
Now, let’s dive into turning that trampoline into a wrestling ring perfect for your next match!
Foundations Of Fun: Setting Up The Base
The base of your DIY trampoline wrestling ring is where the magic starts. It’s crucial for providing a stable and safe structure.
A proper base ensures your ring can handle all the high-flying action and dynamic moves.
Assembling The Frame
- Gather your materials – steel pipes, connectors, and tools.
- Layout the shape – it could be a square or rectangle.
- Connect pipes with connectors to create the frame.
- Ensure all connections are tight with a wrench.
Securing The Springs
- Attach springs evenly around the frame. Use a spring pulling tool.
- Double-check for loose or weak springs.
- Ensure each spring hooks firmly onto the frame.
Bouncing To New Heights: Installing The Trampoline Mat
Creating your own wrestling ring with a trampoline is a thrilling DIY project. The centerpiece of your new wrestling arena is the trampoline mat. This mat will be the stage for all the high-flying action. Let’s dive into the steps you’ll need to follow to install your trampoline mat properly, ensuring maximum safety and enjoyment.
Attaching The Mat
Begin the installation by unboxing the trampoline mat. Spread it out over the trampoline frame. Identify the V-rings or hooks around the mat’s edge. These will later connect to the springs.
- Align each V-ring with the corresponding hole on the frame.
- Attach springs only on four sides to start.
- Make sure they’re evenly spaced. This will help keep the tension balanced.
Now, prepare for the next crucial step by gathering all your tools and springs within arm’s reach.
Tightening For Tension
The right amount of tension is important for the perfect bounce.
- Begin opposite the first spring you attached.
- Move in a star pattern — think of drawing an ‘X’.
- Use a trampoline spring tool for easier hooking.
- Work your way around the trampoline, attaching each spring.
Check for even tension throughout the mat surface. Bounce gently on the mat to ensure no sagging areas. A tight, uniform mat surface means you’re set for action!
| Tips for Optimal Tension |
|---|
| Ensure even spring distribution |
| Double-check all V-rings for secure attachment |
| Inspect springs for signs of overstretching |
With the mat properly installed, you’re now ready to step into some high-energy wrestling fun with your homemade trampoline wrestling ring!
From Springboard To Stage: Adding The Wrestling Flair
Ready to turn your trampoline into an epic wrestling ring? It’s time to go from a bouncy springboard to a grand stage where every leap and bounce feels like a walk-in superstar entrance. Adding that wrestling flair requires more than just enthusiasm. Excitement surges as you envision the thrilling showdowns on your very own wrestling stage. Let’s jump into crafting that ring where dreams of high-flying action come to life!
Padding The Perimeter
Safety is the show-stopper in any wrestling ring. Before the spectacle begins, ensure every edge is safe for the stars of the show. Start by wrapping thick foam padding around the trampoline edges. This isn’t just any padding; it’s a cushion that guards against falls and slips as the wrestlers perform their stunts. Choose bold colors to give it that authentic ring feel.
- Cut foam pads to cover springs and frame.
- Secure pads with heavy-duty straps or zip ties.
- Wrap the padding twice for extra protection.
Take a look at how your old trampoline transforms. It now showcases a perimeter fit for the grandest of takedowns and body slams!
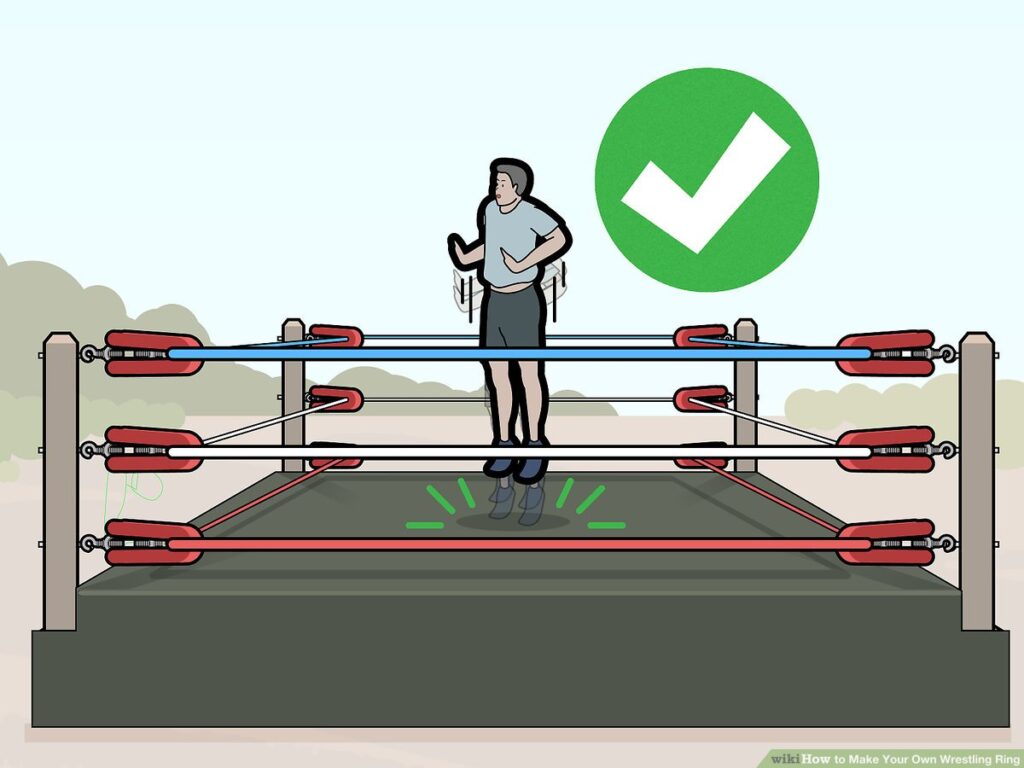
Erecting The Ring Ropes
The ring ropes are where energy meets action. These ropes define your wrestling arena and set the stage for boundary-testing leaps. Choose ropes that can withstand tension and add that vibrant touch to make your ring pop!
- Measure and cut the ropes to fit around the perimeter.
- Attach turnbuckles to the trampoline at four corners.
- Thread ropes through the turnbuckles, ensuring even tension.
- Secure with a strong knot at each turnbuckle.
With the perimeter padded and ropes erected, your DIY wrestling ring stands ready for action. Wrestlers can now bounce off the ropes, embracing the full wrestling experience. Your backyard has just leveled up to a thrilling entertainment arena!
Final Touches: Personalizing Your Wrestling Ring
Your DIY trampoline wrestling ring is nearly complete, but not without those unique final touches. Personalization transforms a standard ring into your battleground. Add logos, designs, and entrance accessories for that extra flair. It’s time to showcase your creativity!
Decorating With Logos And Designs
Make your ring stand out with custom decorations:
- Choose colors that represent your team or theme.
- Use acrylic paint for permanent designs.
- Spray paints offer a quick, even coat.
- Create stencils for logos to maintain uniformity.
- Non-toxic markers work well for details.
Protection is key. Use clear sealant to cover artwork. This prevents wear and tear during matches.
Creating Entrance Accessories
Entrance accessories bring the excitement. They take your ring from fun to professional-level cool.
| Accessory | Description | Impact |
|---|---|---|
| Entrance Ramp | Carpet or plywood styled with colors and logos | Boosts the wow factor |
| Music System | Portable speakers for theme songs | Raises energy levels |
| Lighting | LED string lights or spotlight | Creates drama |
Add a curtain for wrestlers to walk through. Personalize with fabric paint or markers.
Banners and flags help to mark the entrance. They wave proudly as wrestlers arrive.
Remember, safe setup is crucial. Secure all accessories to prevent accidents.
With each of these steps, your customized wrestling ring comes to life. It’s ready to host epic battles and fun memories!

Credit: m.facebook.com

Credit: www.amazon.com
Frequently Asked Questions For How To Make A Diy Trampoline Wrestling Ring: 10 Super Easy Steps!
Can I Build A Trampoline Wrestling Ring At Home?
Absolutely! With straightforward steps and common tools, creating a DIY wrestling ring on a trampoline is totally doable. Ensure you have enough space and gather the necessary materials before starting.
What Materials Are Needed For A Diy Wrestling Ring?
You’ll need a trampoline, safety nets, foam padding, ropes, turnbuckles, and duct tape. These materials ensure the ring’s stability and the wrestlers’ safety. Always prioritize quality for longevity and safety.
How Much Does It Cost To Make Your Own Wrestling Ring?
The cost varies based on material quality and trampoline size. Generally, expect to spend a few hundred dollars. Being resourceful with materials you already possess can help reduce expenses significantly.
How Long Does It Take To Build A Wrestling Ring?
The time needed depends on skill level and assistance. On average, setting up a basic DIY trampoline wrestling ring can take a few hours. Gather all tools and read instructions beforehand to save time.
Conclusion
Jump into action with your homemade trampoline wrestling ring — a project that’s both fun and fulfilling! Each step brings you closer to hours of entertainment. Ready to grapple with gravity? Your DIY adventure awaits. Share your thrilling bounce battles with friends and let the good times roll!