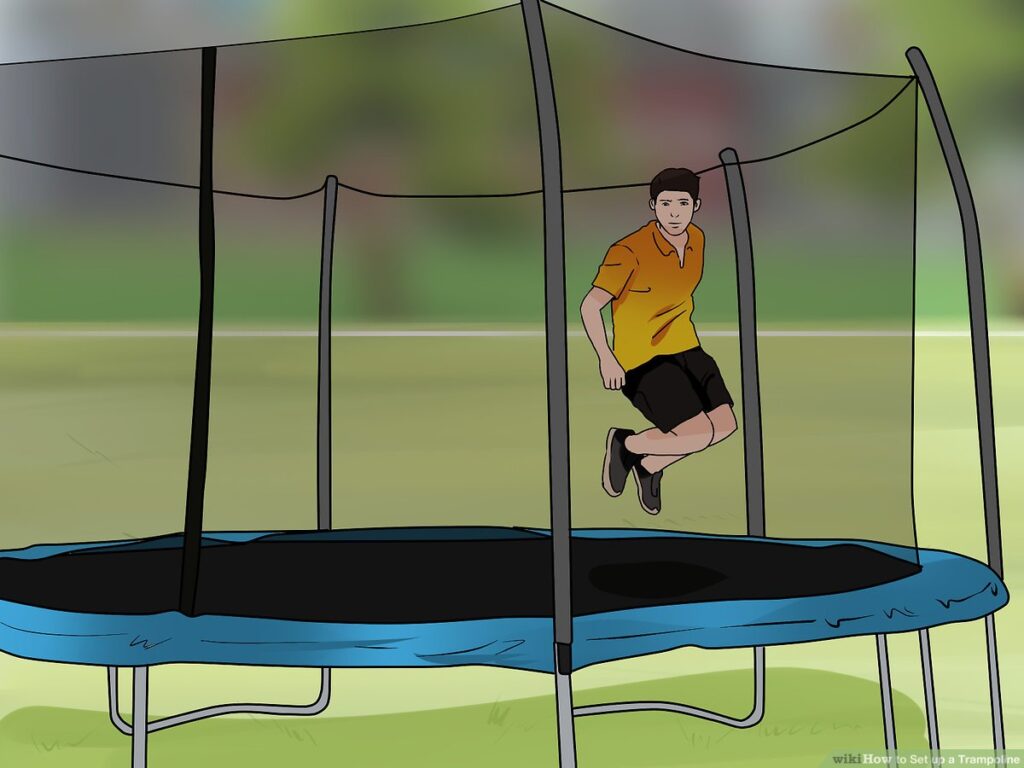
Assembling a trampoline involves setting up the frame, attaching the springs, and securing the jumping mat. Follow a systematic approach, referring to the manual, for safety and efficiency.
Putting together a trampoline can seem daunting, but with the right steps, it’s a manageable task that promises hours of active fun. To get started, choose a clear, level area away from hazards like trees or fences. Safety is paramount when assembling a trampoline, so take the time to organize all parts and tools before beginning.
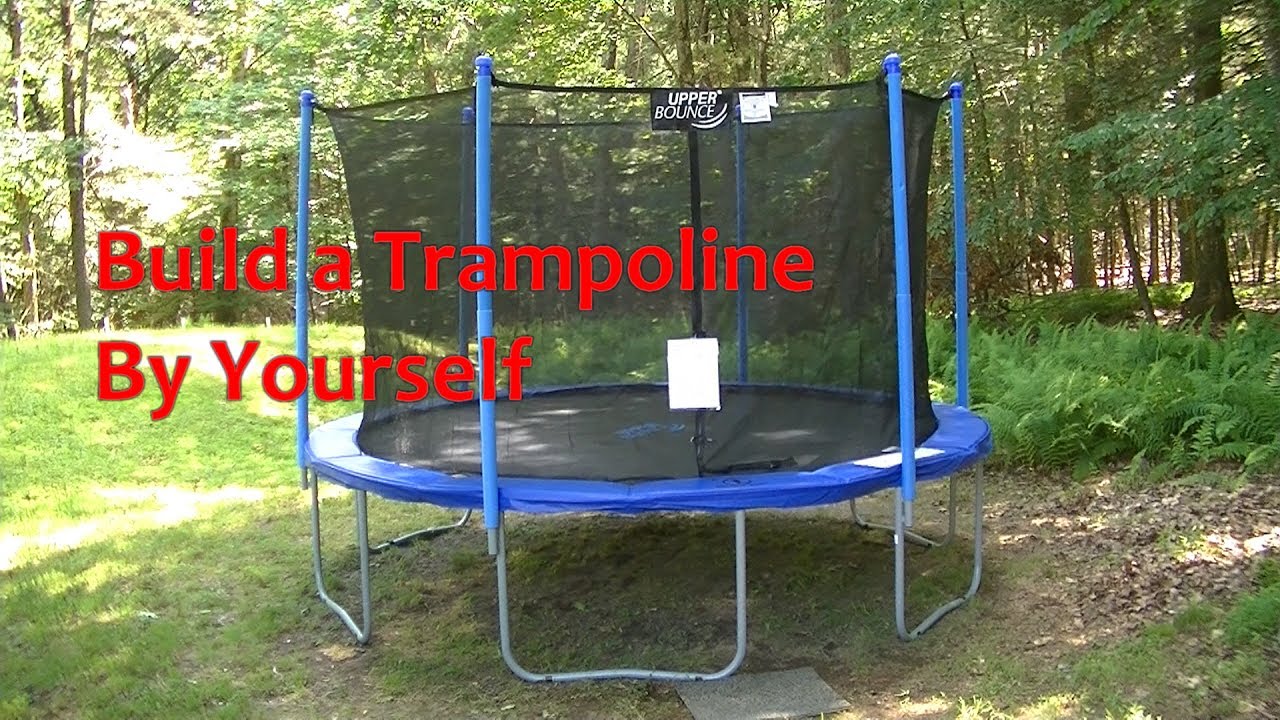
The process typically includes constructing the frame, carefully installing the springs, and securing the jump mat and safety enclosure. Be sure to enlist help—trampoline assembly is a two-person job, designed for teamwork and efficiency. This introduction will guide you through the key stages of trampoline assembly, ensuring that you can confidently set up your equipment for optimal performance and enjoyment.

Credit: m.youtube.com
Introduction To Trampoline Assembly
Gathering family and friends for outdoor fun begins with trampoline assembly. A trampoline offers endless excitement, healthy exercise, and can light up any backyard. The setup journey requires attention to detail and patience. With the right approach and step-by-step instructions, assembly is not just achievable but also rewarding!
Safety First: Preparing For Setup
Before you take the leap, safety is key. Choosing the right spot is critical. Make sure it’s level, clear from hazards, and has ample overhead clearance. Double-check every piece; count them to ensure nothing is missing.
- Firm, flat surface
- No overhanging branches or power lines
- Adequate safety perimeter
Tools And Parts: Ensuring You Have What You Need
Successful assembly begins with the right tools and parts. Most trampolines come with the necessary equipment, but it’s vital to verify.
| Tools | Parts |
|---|---|
| Screwdriver | Frame sections |
| Spring pulling tool | Springs |
| Wrench | Jumping mat |
| Rubber mallet | Safety net |
Check all parts against the manual, ensure they’re in top condition, and lay everything out. Familiarize yourself with every piece; this will make the process smoother.
Credit: www.youtube.com
Selecting The Right Location
Selecting the Right Location for your trampoline is critical for safety and enjoyment. The right spot ensures fun jumps and lowers injury risks. Let’s dive into the key factors you need to consider before you start assembling your backyard bounce-haven.
Evaluating Ground Conditions
The ground where the trampoline will sit must be level. An uneven surface can lead to a lopsided trampoline, increasing the risk of accidents. Use a spirit level to check flatness. Ensure the soil is firm and not too soft. A solid base prevents the trampoline from sinking or moving. Avoid placing your trampoline on concrete or asphalt without safety mats.
Space Requirements And Clearances
Trampolines need plenty of clear space around them. Follow these simple guidelines to ensure enough room:
- Maintain at least 6 feet of clearance on all sides of the trampoline.
- Ensure overhead space is clear of branches and wires.
- The trampoline should be away from walls and fences.
Remember, the space around the trampoline is as important as the space above and beneath it.
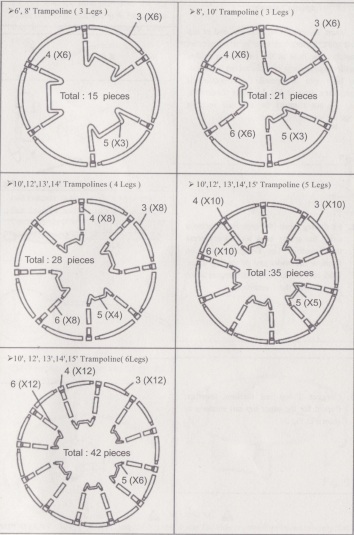
Assembling The Frame
Assembling the Frame is the foundation of your trampoline’s construction. It’s crucial to get this right to ensure safety and stability. Follow these step-by-step instructions, and you’ll be jumping in no time!
Connecting The Sections
- Unbox and lay out all the trampoline frame pieces.
- Identify the frame sections which will make up the circle.
- Connect each section one by one by sliding the ends together.
- Make sure the connections are snug, and each section fits well.
Ensure all pieces align correctly and form a perfect circle. This creates the base for the jumping area.
Securing The Frame
- Once all sections are connected, use the screws provided.
- Fasten each joint securely, using the screwdriver or drill.
- Double-check all screws to ensure they are tight and the frame is sturdy.
Now the trampoline frame is secure. You are ready for the next step – adding the springs and mat!
Installing The Springs Safely
Installing the springs on your trampoline is crucial to its performance and safety. This step requires focus and the right technique to ensure a secure bounce for everyone. The tension provided by the springs gives the trampoline its elasticity, so placing them correctly is not just important, it’s essential. Let’s walk through the process of attaching the springs safely to your trampoline, keeping safety and efficiency in mind.
Attaching Springs Evenly
Even distribution of springs is the key to a well-balanced trampoline. Follow these steps to ensure you get it right:
- Identify the frame holes and mat V-rings.
- Attach a spring to the frame hole, then to the mat V-ring.
- Move to the opposite side and repeat.
- Alternate sides to maintain balance.
- Complete the process until all springs are attached.
Following this cross pattern is crucial for balanced tension and helps prevent frame warping.
Using A Spring Tool
A spring tool is an indispensable part of the spring installation. It protects your fingers from injury and provides the leverage needed to stretch the springs. Here’s how to use it effectively:
- Hook the spring tool into the spring’s hook.
- Pull the tool toward the mat, stretching the spring.
- Hook the spring onto the V-ring securely.
Ensure every spring clicks into place and double-check for any loose ones to maintain a secure and enjoyable jump space.
| Step | Action | Tool |
|---|---|---|
| 1 | Attach spring to frame | Silicone grip |
| 2 | Pull spring with tool | Spring tool |
| 3 | Secure spring to V-ring | Hands |
Laying Out The Jump Mat
Assembling a trampoline can be exciting, but it’s crucial to get started on the right foot. One of the most important steps is laying out the jump mat. This step sets the stage for a secure and safe bouncing experience. Here’s how to lay out the jump mat with precision and care.
Centering The Mat Correctly
Begin by spreading the jump mat across the trampoline frame. Make sure it’s flat and smooth. The mat should have equal distances from all sides of the frame. This balance is key for a safe jumping zone.
- Find the middle: Spot the center of the mat and align it with the center of the frame.
- Check for gaps: Ensure no space exists between the mat and the frame.
- Equal distance: Measure to confirm the distances from the mat to the frame are even.
Connecting To The Springs
Once the mat is centered, it’s time to attach the springs. This step requires a methodical approach for even tension.
- Attach the first spring: Secure it from the center of the mat to a V-ring.
- Opposite sides: Next, connect a spring on the exact opposite side.
- Form an ‘X’: Continue by making an ‘X’ pattern with the springs.
- Work evenly: Ensure each section gets springs before the next one.
This step is crucial. It makes the bounce of the trampoline safe and fun. Always lock each spring into place. This will keep the mat tight and secure.
| Step | Instruction |
|---|---|
| 1 | Identify the center of the frame and mat |
| 2 | Spread the mat evenly across the frame |
| 3 | Attach springs in ‘X’ pattern for balance |
Tips: Wear gloves to protect your hands while handling springs. Use a spring tool if provided. This helps pull and hook the springs to the frame effortlessly.
Attaching The Safety Net
Attaching the Safety Net to your trampoline is a vital step to prevent accidents. Correct installation is key for the net to work effectively. The safety net catches any bouncers that may lose their balance. Let’s take a look at how to set up the safety net with ease.
Erecting Poles And Netting
Setting up the poles properly forms the backbone of your safety net. Follow these steps:
- Identify the safety net poles. Each pole should have a protective foam sleeve.
- Attach each pole to the trampoline frame. Use the provided clamps or screws.
- Slide the foam sleeves onto the poles. This step protects bouncers from pole injuries.
- Connect the safety net to the poles. Some models have clips or ties at regular intervals.
Your poles and netting now stand erect, creating a safety barrier around your trampoline.
Ensuring The Net Is Taut
A taut net is crucial for safety. Here’s how to ensure your safety net is well-tensioned:
- Start at one pole, attaching the top of the net to the cap or hook on the pole.
- Work your way around, pulling the net tightly as you attach it to each pole.
- Repeat the process along the bottom of the net. Secure it to the trampoline frame or mat.
- Check for any sagging areas. Adjust as needed to remove slack.
Your safety net should now be taut. It will securely catch anyone who falls towards the edge.
Securing The Pad Covers
The final touch in assembling your trampoline involves securing the pad covers. This step safeguards against spring exposure. It prevents injury during use. Let’s walk through the process of fitting the pad over the springs and ensuring it stays in place.
Fitting The Pad Over Springs
Lay out the pad on the jumping surface. Make sure it covers all the springs evenly. Align the pad holes with the frame’s hooks or slots. Depending on your trampoline model, the process may vary slightly. Refer to the manual if you’re unsure.
- Stretch out the pad corners to reach the frame.
- Attach the pad straps or hooks to the trampoline frame.
- Ensure no gaps exist between the pad and the jumping mat.
Preventing Pad Movement
With the pad correctly positioned over the springs, it’s time to secure it. This prevents the pad from shifting and exposing the springs. Several techniques keep the pad firmly in place:
- Use the spring loops: Thread the pad straps through these loops.
- Secure the straps under the frame.
- Tighten all straps and hooks so the pad doesn’t move.
Check all the pads to make sure they’re snug and secure. A well-secured pad ensures safety and makes your jumping experience worry-free. Enjoy your trampoline with peace of mind, knowing every component is in its right place.
Credit: www.atlantictrampolines.co.uk
Performing A Safety Check
Before letting anyone bounce away, a safety check is a must. Kids are eager, but safety always comes first. This step ensures everything is in place and secure. Let’s make sure your trampoline is ready for fun and games.
Inspecting For Loose Components
Each bolt, spring, and joint plays a crucial role. Walk around the trampoline. Check every part with your hands. Look for anything that moves when it shouldn’t. Tighten any part that feels loose. Use your tools to secure them. Here’s what to check:
- Legs and frame – Ensure they are fixed tightly together.
- Springs – Each one must be hooked securely.
- Bolts – Confirm no bolt is missing or loose.
Testing The Stability
A stable trampoline is a safe trampoline. Push gently against the frame. Does the trampoline wobble or tip? If yes, recheck the assembly. Adjust the legs till it’s steady. Perform a few test jumps near its center. The trampoline must not tilt or shift. Ensure even weight distribution across the legs.
Tips For Maintenance And Care
Proper maintenance and care extend your trampoline’s life and keep it safe. Follow these tips to ensure endless bouncing fun.
Regular Cleaning Procedures
Keep your trampoline clean to prevent safety hazards and wear. Dirt and debris can damage the mat and springs over time.
- Remove leaves and debris regularly with a soft brush or cloth.
- Wash the mat and safety pad with mild soap and water.
- Rinse thoroughly to avoid slippery surfaces.
- Avoid harsh chemicals which can weaken the material.
- Dry completely before the next use to prevent mold.
Periodic Tightening Of Parts
Regular checks of the trampoline’s parts prevent accidents. Loose parts can lead to structural failure.
- Inspect all parts every month for best practice.
- Tighten screws, bolts, and springs as required.
- Check the frame for bends or breaks.
- Replace worn or damaged parts immediately.
- Secure the trampoline against high winds.
Troubleshooting Common Setup Issues
Building a trampoline can be a joyful project that leads to hours of fun. Yet, sometimes, unexpected hitches can pop up. Let’s dive into some common setup snags and smart ways to fix them quickly. Your dream trampoline is just a few steps away!
Dealing With Uncooperative Springs
Uncooperative springs can make trampoline setup tough. These steps should help:
- Use Spring Tools: Don’t skip the spring tool. It’s there to keep things easy and safe.
- Work in Opposites: Attach springs at opposite ends. This keeps tension even as you go.
- Check for Overstretch: If a spring won’t reach, double-check others. Some might be too tight.
- Replace if Needed: Bent or rusty springs? Replace them. New ones are safer and work better.
Solutions For Uneven Tension
Uneven tension can cause a wonky bounce. Try these fixes:
- Pause and inspect the mat. Make sure it’s centered and aligned properly.
- Detach and reattach springs. Do this systematically around the trampoline.
- Double-check the frame. An unlevel frame leads to uneven tension on the mat.
- Consult the manual. It may have specific advice for your trampoline model.
Frequently Asked Questions On How To Put Together A Trampoline: 10 Steps Trampoline Assembly Instructions!
Can I Assemble A Trampoline By Myself?
Yes, it is possible to assemble a trampoline alone, but it may be challenging. It’s typically easier and safer with at least two people to help manage the large parts and springs.
What Tools Are Needed For Trampoline Assembly?
Common tools required for trampoline assembly include a spring tool, which is usually provided, a Phillips screwdriver, and a rubber mallet. Check your trampoline’s manual for any additional specific tools needed.
How Long Does Trampoline Setup Take?
On average, trampoline assembly can take two to four hours. This time can vary based on the trampoline size and the number of people working on the assembly. Having an extra set of hands can reduce this time.
Are There Any Safety Tips For Trampoline Assembly?
Ensure all parts are securely attached before use, follow the manufacturer’s instructions closely, and double-check all springs and bolts are tight. Regularly inspect the trampoline for potential wear and tear.
Conclusion
Assembling a trampoline can be a fun family project, following these 10 simple steps. With your new trampoline now ready, endless hours of joyful bouncing await. Always prioritize safety and perform regular maintenance checks. Happy jumping!