To create a DIY trampoline tent, drape a tarp over the top and secure it with bungee cords. Ensure the material is weather-resistant and the structure is stable.
Trampoline tents offer a delightful backyard retreat for kids and adults alike. The allure of combining the fun of bouncing with the coziness of a secret hideaway is undeniable. Embarking on a DIY trampoline tent project is not only cost-effective but also allows for customization.
Whether for daytime play, evenings under the stars, or imaginative adventures, a trampoline tent can be a versatile addition to any outdoor space. With simple materials and a touch of creativity, transforming a trampoline into a tent is an enjoyable endeavor. Fortifying your trampoline with this homemade accessory encourages more outdoor time and can quickly become the neighborhood’s favorite hangout spot.
The Appeal Of Diy Trampoline Tents
The joy of homemade creations brings us to the unique allure of DIY trampoline tents. A trampoline provides hours of fun, but with a DIY tent, it transforms into an adventurous hideaway or a cozy spot for stargazing. Turning this dynamic play equipment into a multipurpose area sparks creativity and extends playtime well beyond the day.
Versatility Of Use
Imagine a trampoline reimagined – not just for jumping. DIY trampoline tents open up a world of possibilities:
- Sleepovers become epic with a tent canopy under the stars.
- Escape the sun with a cool shaded play area during hot days.
- Read and relax in a personal outdoor nook.
- Turn it into a circus tent for pretend play.
Personalized Touch
Your trampoline, your rules! With DIY, personalize your tent to reflect your style:
- Choose fabrics and colors that pop or blend with your backyard.
- Add lights, pillows, and accessories for comfort and flair.
- Create windows and doors for a unique design.
- Let your imagination run wild with themes – space station, castle, or jungle hideout.
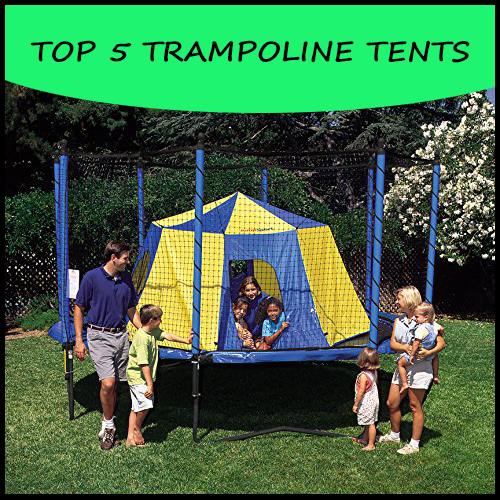
Credit: www.girlslife.com
Essential Materials And Tools
Ready to transform your trampoline into a cozy haven? Let’s gather the essential materials and tools. Quality materials ensure durability while the right tools make assembly a breeze.
Choosing The Right Fabric
Selecting the proper fabric is crucial for your DIY trampoline tent. Look for options that offer weather resistance and toughness. Waterproof canvas or polyester are excellent choices. These fabrics can withstand the elements and provide a comfortable shelter. Ensure you have enough fabric to cover the entire trampoline, with some extra for entrances and windows.
- Waterproof canvas – Perfect for protection against rain.
- Polyester – Lightweight and durable.
- Elastic ties – To secure the fabric to the trampoline frame.
Frames And Poles: What You Need
A sturdy frame supports your tent structure. Use strong poles that fit your trampoline size. Metal or PVC pipes work well.
Here’s what you’ll need:
| Material | Quantity | Use |
|---|---|---|
| Metal poles/PVC pipes | Based on trampoline size | Frame structure |
| U-bolts or hose clamps | Sufficient for all joints | Securing poles |
Tools For Assembly
Gather these tools before you start:
- Tape measure – To measure fabric and poles accurately.
- Scissors/utility knife – For cutting fabric and ropes.
- Screwdriver/wrench – To tighten U-bolts or hose clamps.
- Sewing machine – If you plan to sew fabric sections.
With these materials and tools at hand, your DIY trampoline tent project is set for success.
Planning Your Trampoline Tent
Imagine bouncing under starry skies or reading books in your cozy hideout. Creating a DIY trampoline tent turns your trampoline into a multipurpose adventure. Start with good planning to guarantee fun and safety. Let’s jump into the crucial steps to make that dreamy trampoline tent a reality.
Size And Shape Considerations
Trampolines come in various sizes and shapes. A perfect tent complements your trampoline’s specific dimensions. Measure the diameter for round trampolines. Consider the length and width for rectangular ones. Your trampoline shape decides the tent’s structure. Keep in mind space for easy entry and exit.
- Round Trampolines: Ideal for dome or teepee tents.
- Rectangular Trampolines: Best for cabin-style tents.
- Oval Trampolines: Go for elongated dome designs.
Selecting A Design
Choose a design that sparks joy and caters to your needs. Consider functionality and aesthetics. Do you want windows for airflow, or pockets for storage? A teepee design is simple and charming. A dome shape offers more room. Select a design that’s both practical and pleasing to the eye. Use sturdy, weatherproof materials. Add personal touches with colors and patterns.
| Design Type | Features | Suitable For |
|---|---|---|
| Teepee | Easy setup, peaked top | Small to medium trampolines |
| Dome | Spacious, stable | Large trampolines |
| Cabin | Room-like, with walls | Rectangular trampolines |
Safety Measures
Safety is key when planning your trampoline tent. Stable anchoring prevents flapping or tipping. Secure the tent firmly to the trampoline frame. Use materials that are fire-retardant and breathable. Ensure ample ventilation to prevent carbon dioxide buildup inside. Make an emergency exit plan. Regularly inspect the tent for wear and tear. Place soft mats around the trampoline. Pre-pitch the tent to test stability.
- Anchor the tent firmly.
- Choose fire-retardant materials.
- Guarantee good airflow.
- Check for potential hazards.
- Position safety mats outside.
- Conduct a safety inspection.

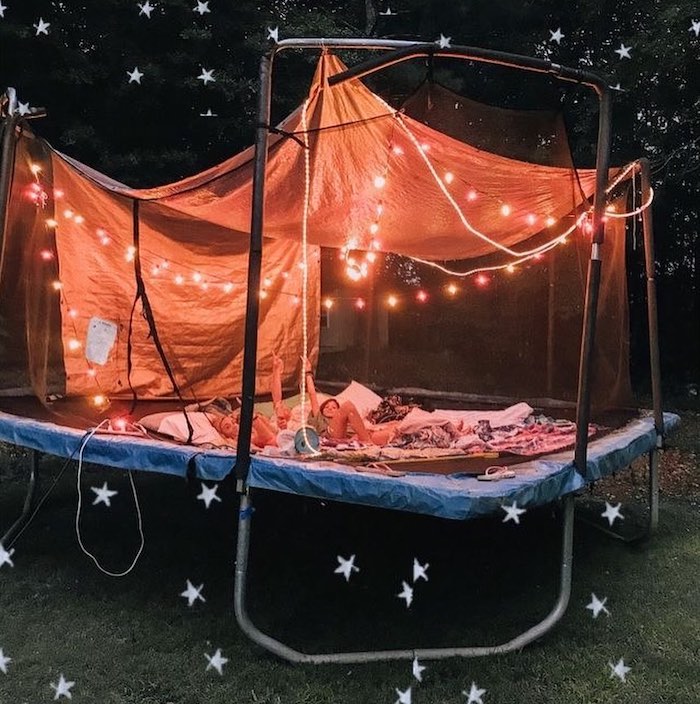
Credit: www.pinterest.com
Step-by-step Construction
Embarking on a Step-By-Step Construction of a DIY trampoline tent transforms your backyard into a whimsical escape. Follow these steps to create a cozy hideaway or a fun sleepover spot. Let’s dive into the process!
Building The Frame
- Select durable materials like PVC pipes or aluminum rods.
- Measure the diameter of your trampoline for size accuracy.
- Connect rods using T-joints to form a circular frame that fits the trampoline.
- For stability, create arches or a dome by connecting additional rods on top.
- Use snap-on clamps to attach the frame securely to the trampoline.
Attaching The Fabric
- Choose weather-resistant fabric to ensure longevity.
- Cut the fabric to cover the frame with extra for overhang.
- Attach Velcro strips or hooks to the edges of the fabric.
- Align carefully and attach the fabric to the frame, pressing firmly.
Securing The Tent
Ensuring your tent stays in place is crucial, come rain or shine.
- Use heavy-duty bungee cords or ropes to secure the bottom of the fabric to the trampoline frame.
- Double-check all connections for a tight fit, eliminating any gaps.
- Anchor the poles into the ground with stakes for added resistance against wind.
- Install a zipper or flap for an easy entrance and exit.
- Lastly, test the stability of your DIY trampoline tent to ensure safety.
Customization Ideas For Your Tent
Transforming your trampoline into a haven of fun just got more exciting! Your DIY trampoline tent offers endless opportunities for customization. Let your creativity soar as you design not just a tent, but a unique space filled with your personality and flair. Below are easy-to-implement ideas for adding that personal touch to your DIY trampoline tent.
Adding Windows And Doors
Windows and doors make your trampoline tent feel like a home. Follow these simple steps:
- Choose the material: Mesh for windows, fabric for doors.
- Cut out shapes: Circles, squares, or any fun design.
- Attach securely: Use velcro or zippers to fix them in place.
Interior Decorating Tips
Make the inside of your tent cozy and welcoming:
- Soft furnishings: Add cushions and rugs for comfort.
- Lighting: String lights or lanterns for a warm glow.
- Storage: Pockets or bins to keep toys and books tidy.
Thematic Designs
Choose a theme to set the stage for adventure:
| Theme | Elements to Include |
|---|---|
| Space Odyssey | Stars, planets, astronaught helmet |
| Enchanted Forest | Trees, animals, fairy lights |
| Pirate Ship | Treasure map, flag, faux wheel |

Credit: kriselkeeper.wordpress.com
Maintenance And Care
Crafting a DIY trampoline tent adds a fun twist to outdoor play. But it’s crucial to keep it in top shape. Proper maintenance and care extend its life and ensure safety. Follow these easy guidelines to keep your tent bouncing back for more fun.
Cleaning Your Trampoline Tent
Keeping your trampoline tent clean is vital. Dirt and debris can affect its performance. Use mild soap and water to gently wipe down the tent fabric. Be sure to dry it completely before folding to prevent mildew. Avoid harsh chemicals, as they can degrade the material.
Seasonal Storage Advice
When the seasons change, proper storage is key to protect your tent. Before packing it away, ensure it is dry and clean. Store in a cool, dry place away from direct sunlight. Use a protective cover to shield it from dust and pests.
Wear And Tear Prevention
Regular checks for holes or frays can save you from bigger issues later. If you spot damage, repair it immediately to prevent it from getting worse. Also, ensure that kids remove shoes and sharp objects before playing to minimize wear and tear.
Frequently Asked Questions For Easy Ways To Make Diy Trampoline Tent
Can I Build A Trampoline Tent Myself?
Yes, you certainly can build a trampoline tent yourself. With some basic materials and tools, you can transform your trampoline into a cozy hideaway. It’s a straightforward DIY project suitable for a weekend activity.
What Materials Do I Need For A Diy Trampoline Tent?
For a DIY trampoline tent, you’ll typically need waterproof fabric, strong elastic bands, hooks, and possibly poles for structure. Ensure the fabric is large enough to cover your trampoline and provide enclosure.
How Do I Secure My Trampoline Tent?
To secure your trampoline tent, attach the fabric to the trampoline frame using hooks or ties. Use elastic bands to maintain tension and keep the fabric in place. Ensure everything is fastened tight for safety and stability.
Will A Trampoline Tent Hold Up In Bad Weather?
Trampoline tents are generally weather-resistant but not weatherproof. For bad weather, choose durable, waterproof material and secure the tent well. However, it’s best to dismantle in extreme conditions to avoid damage.
Conclusion
Crafting your DIY trampoline tent is a breeze with the right guidance and materials. Not only does this project enhance your outdoor fun, but it also adds a personal touch to your trampoline adventures. For an imaginative, cost-effective update to your backyard, get started on your DIY trampoline tent now.
Jump into creativity—it’s time to elevate your outdoor experience!